Part 2 of a guest post by Gil Dye who is a volunteer at Discovery Museum in Newcastle.
From a lacemaker’s point of view a small collar – ref: TWCMS_ H2387 – is one of the most interesting tape-lace collars in the TWAM collection. It is a good example of Branscombe Point, with many distinctive features of this lace including: narrow machine-made tape; a purled edge; cut-works (woven spiders); knibs (button-holed bars with small loops) and a variety of needle-made stitches and fillings.
Branscombe lacemakers developed many new stitch combinations and often gave them names relating either to how they looked, or the person who first used that stitch grouping. The Branscombe names listed below are linked to numbers on the pictures.
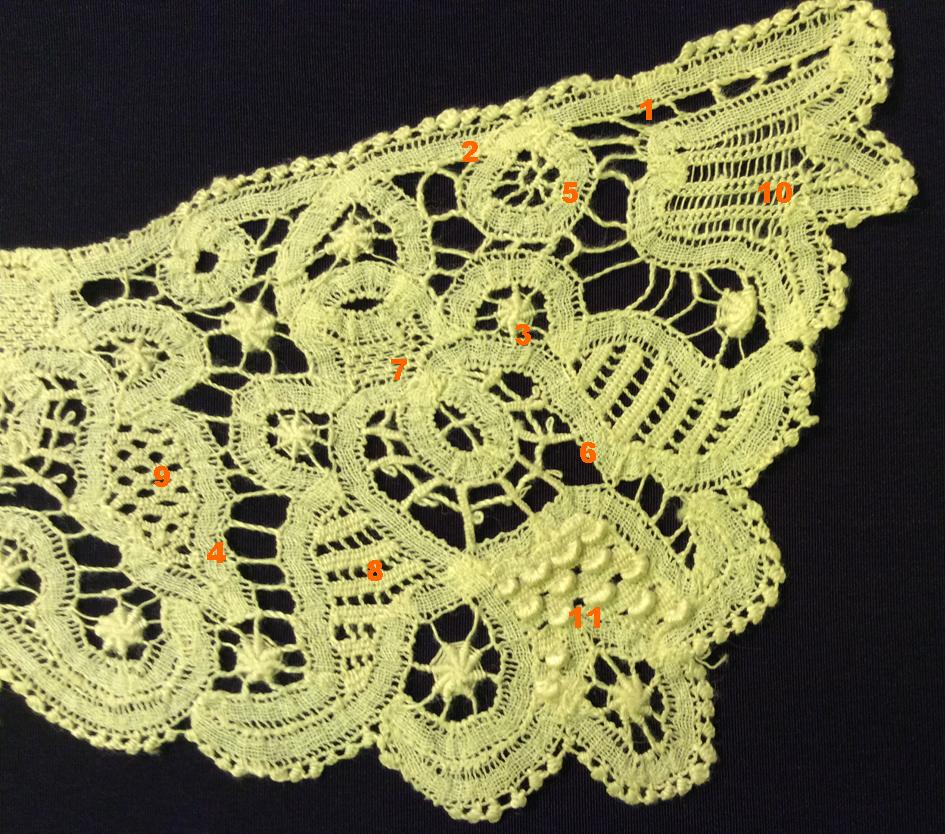
Stitches used in the end section of the Branscombe Point Collar 1. Plain tape 2. Purling 3. Ribbed Cutwork 4. Twisted bar 5. Work around 6. Knib 7. Linen Stitch variation (otherwise called corded double button-hole stitch) 8. Church Stitch variation 9. Shell Stitch 10. Ladder Stitch (my description) 11. Bullion Loops

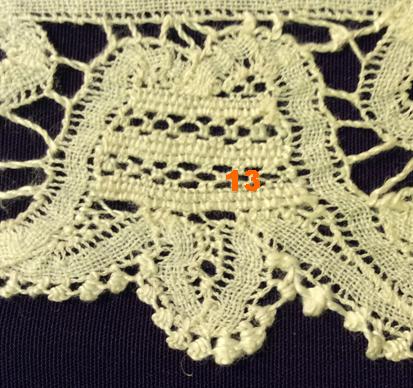
Stitches from the centre of the collar: 12. Butterfly 13. Bars and double knot
Stitches from the centre of the collar: 12. Butterfly 13. Bars and double knot
Information about the history of Branscombe Point and the people who made it, can be found in The Technique of Branscombe Point Lace, by Lillie Trivett (Batsford, 1991, ISBN 0 7134 6761).
Also in this book are detailed instructions for preparing patterns and tape outlines, and working cut-works, knibs, purling and a variety of fillings.
Working a sample
Fillings numbered 10 and 11 are unusual, and do not appear in either of the books mentioned. Although it is many years since I did any Branscombe point lace it seemed that working a sample would be the best way to test my theories about how the stitches were worked.
I started by tacking a traditional Branscombe tape around the outline of a candle, with a diagonal across the centre. I then used Madeira Tanne 30 to whip round the inside edge and neatened the corners before working the stitches.
For the bullion loops (stitch 11) I started on the long side of the lower section with two rows of single button-hole stitch, the first row corded the second whipped, next:
*one row twisted button-hole stitch spaced 4 stitches apart; whipped back;
two rows corded button-hole stitch, one row whipped;
Repeated from* to fill space – twisted stitches positioned above ones on the row below.
Bullion stitches then worked by wrapping a thread four times round 2 twisted stitches – without pulling tight – then whipping the bundle before moving diagonally (behind the work) to the next pair of twisted stitches.
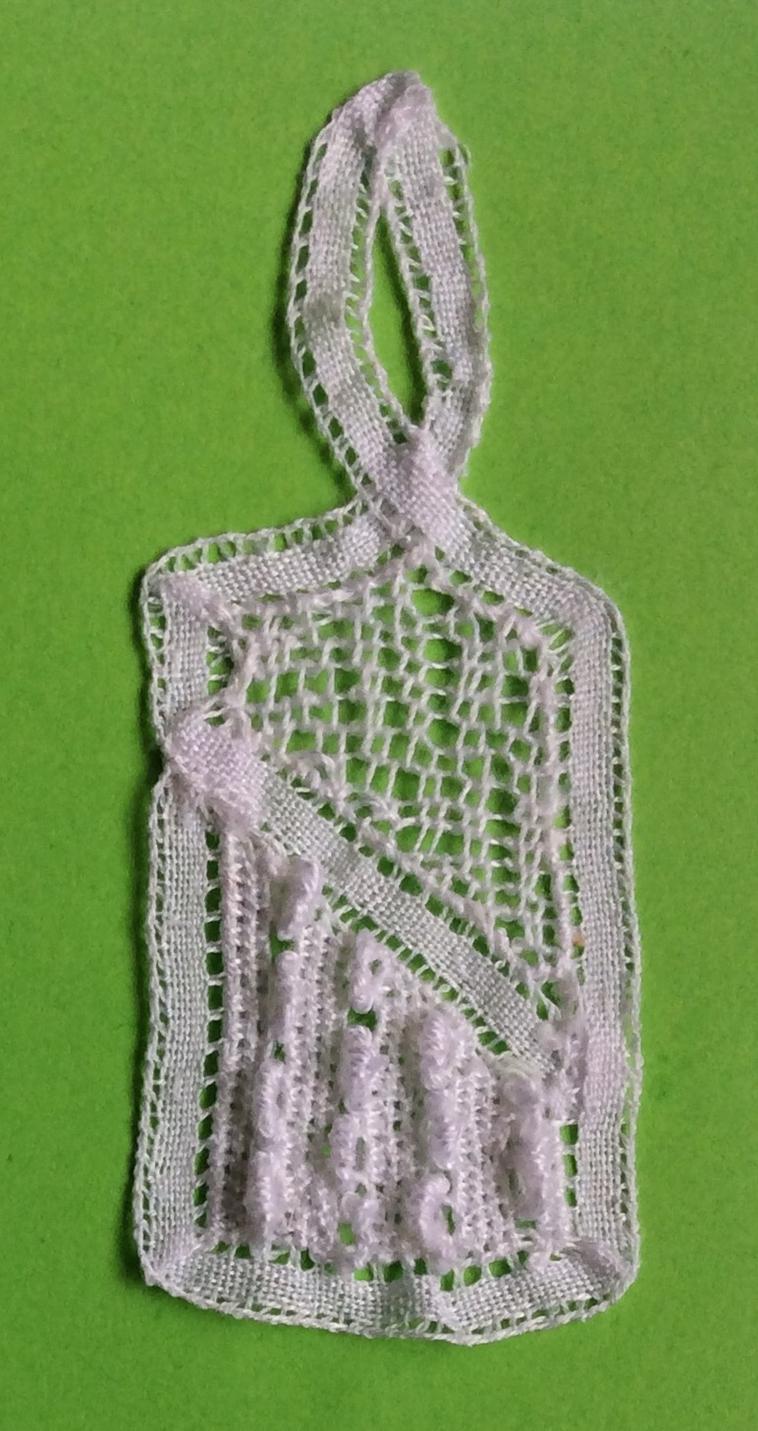
Sample attempt at stitches 10 and 11
For stitch 10, I first stretched horizontals across the space, then started at the base and whipped twice round each horizontal to the top, fastened the thread to the tape and whipped back with the two lines of whipping together.
I have probably used a softer thread than the original – which results in a less crisp finish – and my tension definitely leaves a lot to be desired; this has resulted in neither stitch looking exactly like the original. However the stitches are probably technically correct.
Companion Collar
A surprising discovery in the Discovery collection is a second tape collar – TWCMS_H2367 – that is almost identical in shape to the Branscombe Point collar. This is also a tape lace, but it does not have the quality of workmanship of the Branscombe version, and has a machine-made picot edging instead of hand-stitched loops.
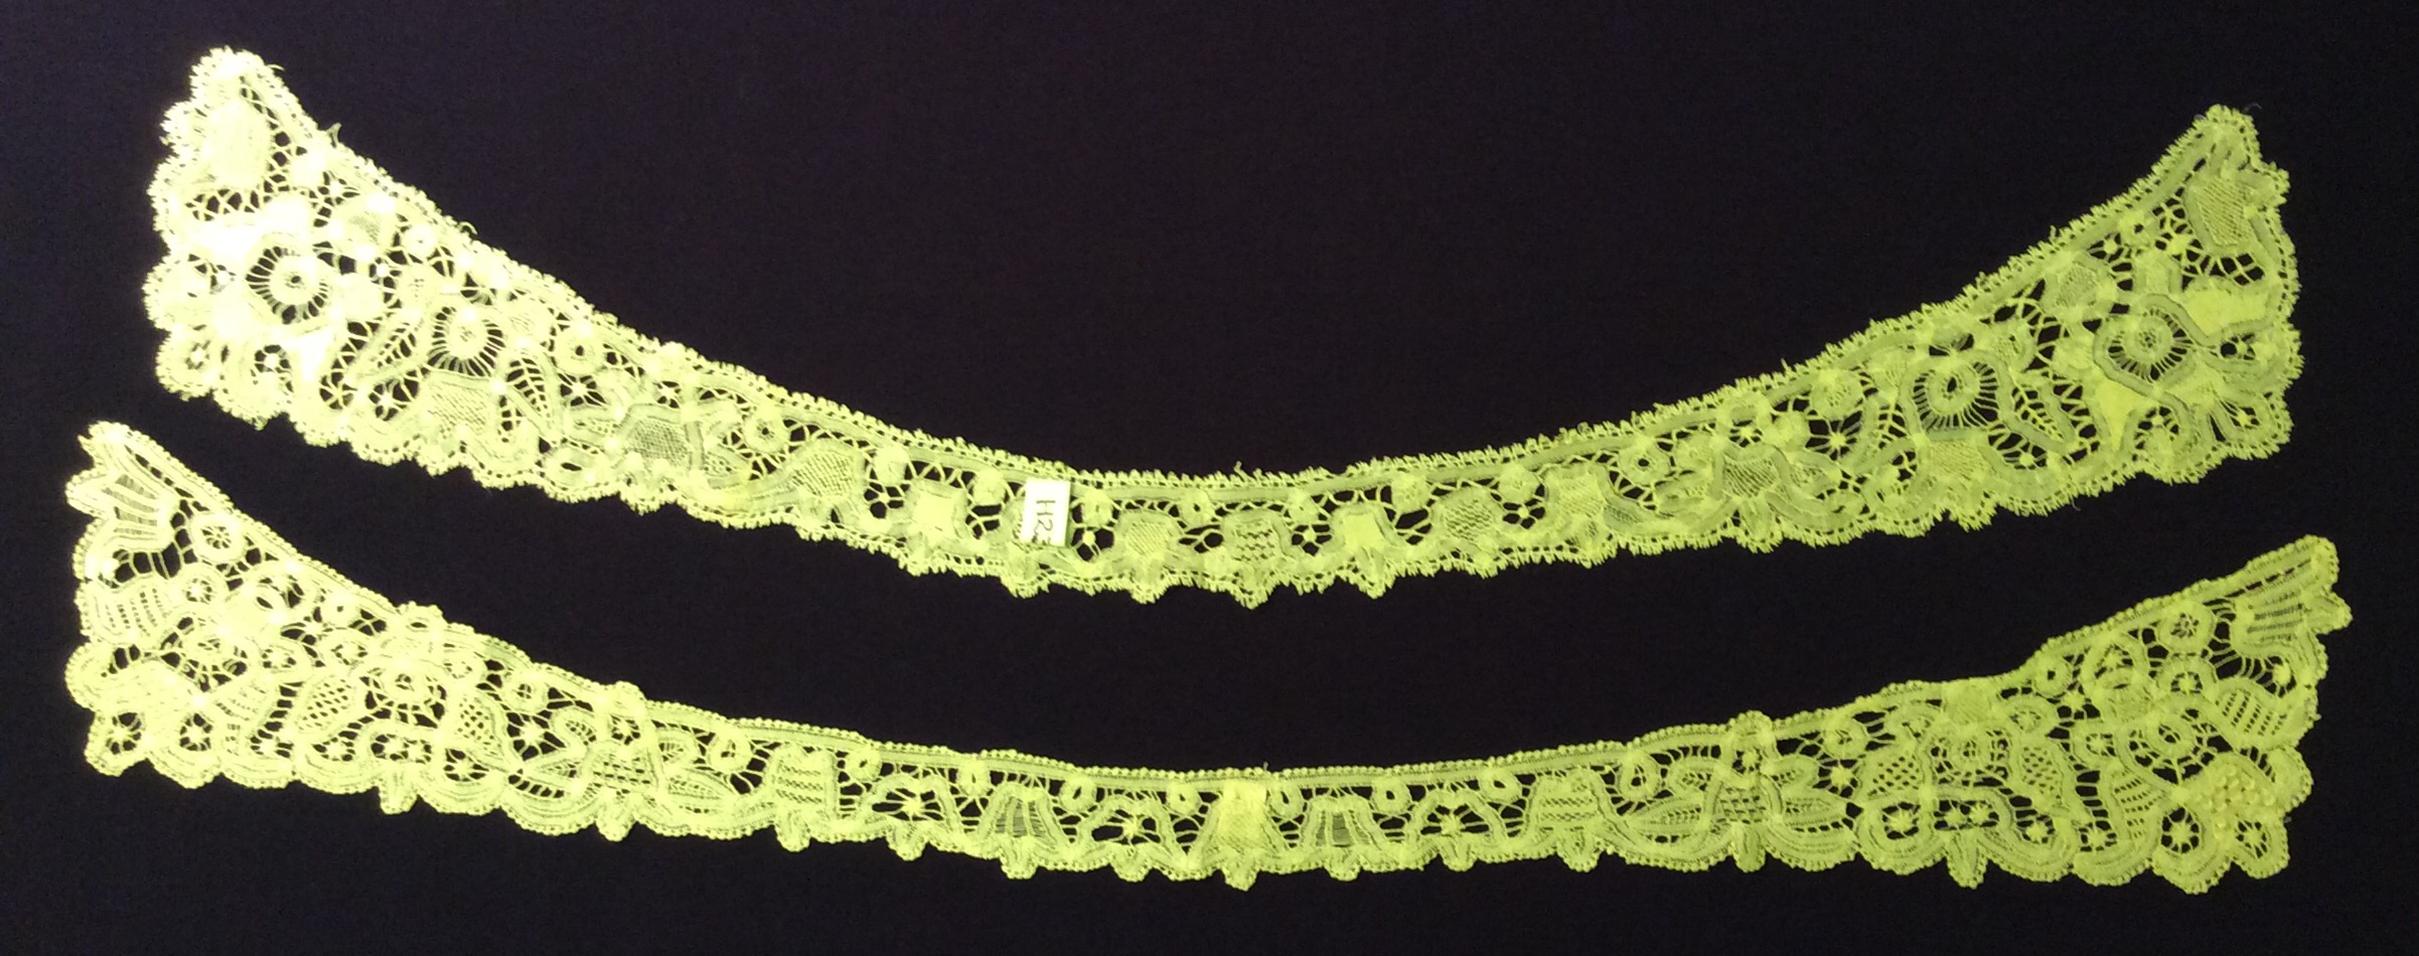
Comparison of shapes of two tape-lace collars, TWCMS_H2367 above, TWCMS_H2387 below
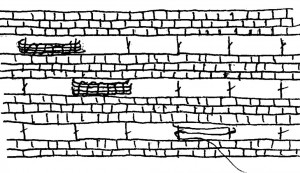
In the days before scanning and photocopiers a standard way of copying a pattern was to make a rubbing by placing existing lace on a hard surface, covering it with a sheet of brown (or tracing) paper and rubbing over it with heelball, in the same way that we might today make a brass rubbing. This does not make a particularly accurate copy.
The initial impression of the ends of the two collars in the pictures below does not suggest any close likeness, however a closer look shows that the paths of the tapes are actually quite similar and both could have been taken from the same rubbing, or one from a rubbing of the other. There is no information on the museum database providing provenance for either of these pieces, however the closeness of the accession numbers – H2387 and H2367 – indicates they probably came into the collection at the same time and from the same source. It is likely that both collars date from around 1900.
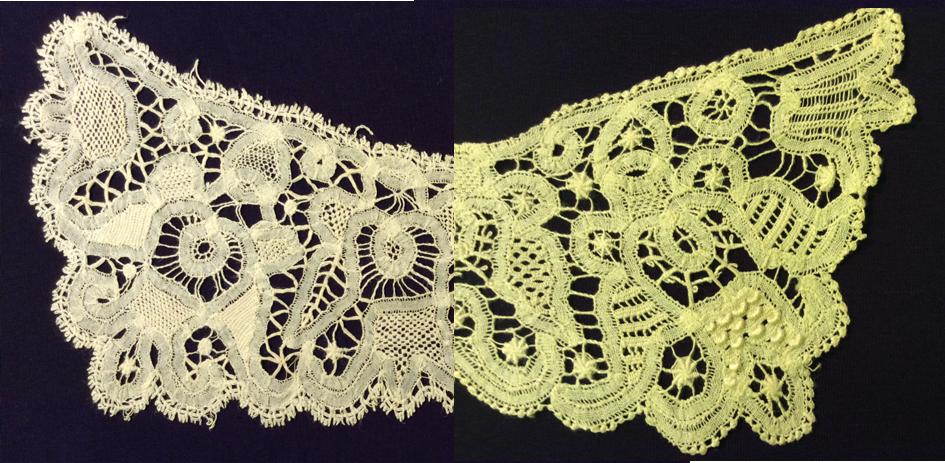
Comparison of ends of two collars, TWCMS_H2367 left, TWCMS_H2387 right
Gilian Dye
(Discovery Museum Volunteer)